Chair Placement Checklist for Better Room Flow

Chair Placement for Flow and Function: A Practical Room Layout Guide with Checklist
Comfortable seating is only part of a successful room—chairs also control how people enter, pass through, sit, talk, and use surfaces. A layout feels “right” when circulation is obvious, chairs support the way the room is actually used, and everyday actions (pulling out a chair, opening a drawer, walking past someone seated) don’t require a second thought. Use the steps below to map movement paths, set clearances, anchor seating to focal points, and fine-tune angles so the room stays effortless day to day.
Start with movement: identify the room’s “paths” before placing chairs
Before choosing the “perfect spot” for an accent chair, decide where people need to walk. Mark your primary routes first—entry to entry, door to closet, hallway to windows, kitchen to dining, sofa to media. These paths are non-negotiable; chairs should support circulation rather than compete with it.
Next, group activities into zones (conversation, reading, work, dining, play). When each chair is tied to a purpose, the room looks more intentional and functions better with fewer pieces. A quick, low-effort test: use painter’s tape or paper cutouts to mark chair footprints on the floor, then walk the routes at a normal pace. Any spot that makes you turn sideways, pause, or “thread the needle” is a pinch point to fix now—before it becomes a daily annoyance.
Clearance rules that make rooms feel easy to use
Comfortable rooms protect pass-by space around seating groups and provide enough pull-out room wherever someone sits at a table, desk, vanity, or game surface. Also account for doors, drawers, and recline/swivel arcs—especially for office chairs and recliners. When space is tight, reducing the number of chairs usually improves function faster than shaving clearances down to the bare minimum.
Quick chair placement clearances (everyday comfort targets)
| Situation | Recommended clearance | Notes |
|---|---|---|
| Main walkway through a room | 36 in / 91 cm (minimum), 42–48 in / 107–122 cm (comfortable) | Aim higher in family homes, open plans, or high-traffic routes. |
| Secondary pass-behind space (behind a chair or sofa edge) | 30–36 in / 76–91 cm | Use 36 in if people frequently pass behind seated guests. |
| Chair pull-out space at dining table/desk | 24–30 in / 61–76 cm behind chair | Measure from table edge to obstacle; add more if a walkway continues behind. |
| Between coffee table and seating | 14–18 in / 36–46 cm | Closer feels cozy; wider improves legroom and circulation. |
| Between two chairs (side-by-side seating) | 4–12 in / 10–30 cm | Tight for a paired look; wider if armchairs are bulky. |
| TV viewing: seat to screen distance | Varies by screen size | Use manufacturer guidance and adjust for comfort; avoid placing chairs in high-glare zones. |
For accessibility-minded planning, it can help to compare your walkways to established guidelines like the 2010 ADA Standards for Accessible Design, and for kitchen-adjacent clearances, reference the National Kitchen & Bath Association (NKBA) planning guidelines.
Anchor chairs to a focal point without blocking flow
Every zone needs a “why” and a “where.” Choose the focal point first: a fireplace, TV, window view, bookshelf, or a conversation center like a coffee table. Then place chairs to support that focus while keeping the line of sight open from entry points. A chair back can read like a visual wall when it sits too close to a doorway or faces the entrance at the wrong angle.
Conversation geometry: spacing and angles that feel natural
Room-by-room chair placement checks
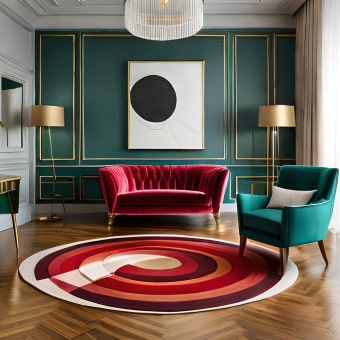
Living room
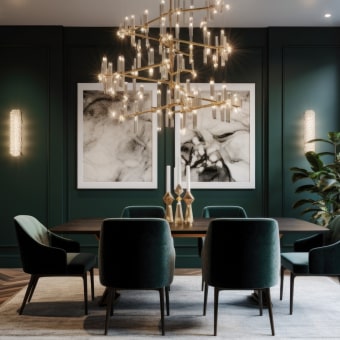
Dining area
Bedroom
Home office
Allow enough behind-chair room to stand, push back, and pivot—especially for rolling desk chairs. Keep guest seating outside the rolling zone so it doesn’t become an obstacle during calls or focused work. If you’re setting up a desk for meetings, pairing a clean layout with a dedicated audio setup can help; the RGB USB Condenser Microphone for Streaming, Recording, Gaming & Studio fits well into a functional workstation where chair placement and cable routing are planned together.
Entryway
Fix common layout problems fast
Problem: the TV zone dominates everything. Create a second focal point (window, art, bookshelf) and float a chair to support it without blocking the main route. For more design guidance and examples, browse room planning features from Architectural Digest.
A printable-style checklist for interior planning
Digital guide and checklist for chair placement
If you want a quick-reference resource for turning measurements into workable layouts, the Chair Placement for Flow and Function digital guide and checklist includes a step-by-step method for zoning, clearance planning, and troubleshooting common chair placement issues. It’s designed to be easy to use during rearrangements, moves, and room refreshes—especially when deciding whether to add, remove, or re-angle chairs.
FAQ
How much space is needed behind a dining chair?
Plan for about 24–30 inches behind the chair, measured from the table edge to the nearest obstacle. Choose the higher end when there’s a walkway behind the chair, the chairs are larger, or the seats are used frequently.
Where should an accent chair go in a small living room?
Place it to complete a simple conversation triangle with the sofa, slightly angled inward, and add a nearby side table for a drink or book. Protect the main walkway and keep it out of door swings so the chair feels like a destination rather than an obstacle.
How can chair placement improve flow in an open-concept space?
Use rugs and furniture edges to define zones while keeping one clear circulation lane that connects major destinations. Chairs can form gentle boundaries (like the edge of a living area) as long as they don’t create a hard barrier that people must detour around.


Leave a comment